Infra red

Not spring colour, but some infra red images from a roll taken whilst I was at college….circa 1980. They came to mind after a conversation this morning. Requiring the old E4 process, which was pretty much obsolete, even then, it was a bit of a palava to use. And expensive. But turning anything containing chlorophyll bright red, it was interesting to play with.

Woodland, Moat Mount, infra red

Woodland, Moat Mount

Woodland, Moat Mount, infra red

Woodland, Moat Mount

Bishops Park near Putney Bridge, infra red

Bishops Park near Putney Bridge

Churchyard, Bishops Park near Putney Bridge, infra red

Churchyard, Bishops Park near Putney Bridge

Leica M6

After my brief flirtation with a Leica M6, a set of test shots taken on a quick walk along the Thames between Chiswick and Kew Bridges last week. These are shop scans put through Lightroom. They have more jpg artifacts than you can shake a stick at, along with a very generous helping of sharpening from the person who scanned them, but they’re ok for reference.

Verdict…would I buy one? I’ll have to flip a very expensive coin on that!

60 minutes, 8th December 2012

The first walk I’ve done in a while…..


Waterlillies

Earlier in the year I visited the Monet Gardens at Giverny to photograph the waterlillies. Prior to the shoot, I was asked to make some test shots for a few ideas I had, and these are the results. Shot at my local, Kew, the ideas weren’t adopted in the end, but a few days ago I finally made some high res scans.

I love using square format. Unfortunately most art directors worry when you mention it. To fit a page, a crop is almost inevitable, making its use irrelevant.  And why shoot a beautful garden in black and white? The area around the lake at Giverny is green. And then there is a lot more green, which is not surprising really, as it’s largely a  woodland type planting. There are occasional splashes of colour, but I wanted to capture the tonality. My darkroom instincts come to the fore in these situations!

Colour was eventually decided on and I shot some lovely graphic images – once these have been published next spring, I’ll post these too. And waterlillies – they’re absolute devils. If they decide to open, it’s a long wait. I timed one and it took 2 hours and 15 minutes. I’d normally have better things to do than standing around with a stop watch, but when you are planning a ferry trip home, it was essential. But worth the wait!

water lilies at Kew Gardens

water lilies at Kew Gardens

water lilies at Kew Gardens

water lilies at Kew Gardens

water lilies at Kew Gardens

water lilies at Kew Gardens

roots in glasshouse at Kew Gardens

roots in glasshouse at Kew Gardens

The Coast of Light – Andalucia

Some additions to the Coast of Light series I started a couple of years ago. Taken with my Fuji 6×4.5cm, the films and lo res scans arrived this morning. I quite like them as they are, as the colour is slightly muted, but I will make high res scans when time allows.

Sevilla, Parque Maria Luisa

Sevilla, Parque Maria Luisa

Cadiz

Cadiz

Sevilla, Parque Maria Luisa

Sevilla, Parque Maria Luisa

Conil, Spain

Conil, Spain

Conil, Spain

Conil, Spain

Cadiz

Cadiz

Sevilla, Parque Maria Luisa

Sevilla, Parque Maria Luisa

Cadiz

Cadiz

Cadiz

Cadiz

Cadiz

Cadiz

Sevilla, Parque Maria Luisa

Sevilla, Parque Maria Luisa

Sevilla, Parque Maria Luisa

Sevilla, Parque Maria Luisa

Alternative print processes

Last week the printer and photographer, Jack Lowe, added a new posting to his blog about Calotype printing. He has been experimenting with digital negatives suitable for old print processes, and has collaborated with photographer Richard Freestone in producing two prints using the Calotype process. This struck a chord with me. During the late 1990’s, I spent a long time in my darkroom working with similar techniques. My particular interests were gum bichromate and Kallitype printing.

These are contact printing processes, which require negatives the same size as the final print. The sensitized paper with the negative on top is exposed to light before developing in the required solution. In the case of gum bichromate, this is water.

A quick glossary:

Kallitype –  a suitable paper is first coated with a solution of ferric oxalate and silver nitrate.

Calotype – a suitable paper is  coated with a solution of weak salt solution, dried, then brushed with a weak silver nitrate solution, dried, making silver chloride. Fox Talbot used this process and he referred to it as the Talbotype.

Gum bichromate – a suitable paper is coated with a solution of gum bichromate mixed with water colour pigment.

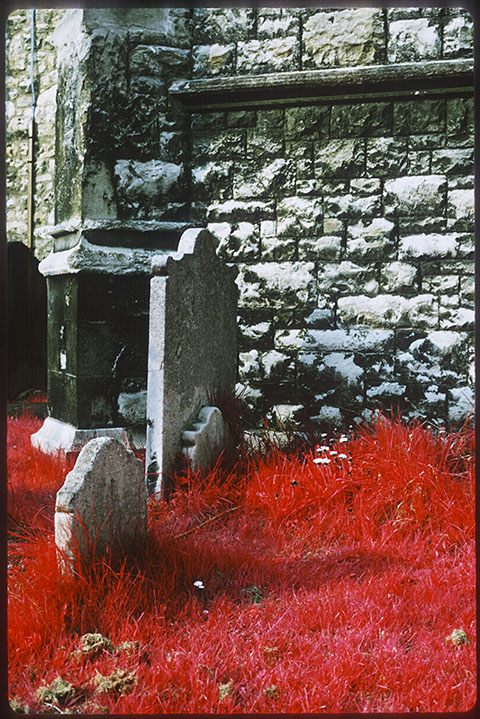
Kallitypes and Calotypes may at first glance appear very similar, as they can have a similar red-brown hue.

Richmond lock on River Thames - Kallitype print

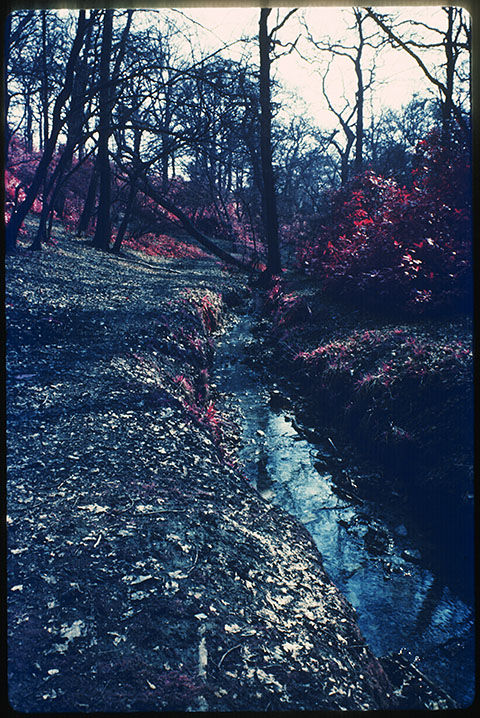
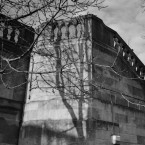
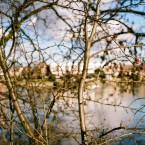
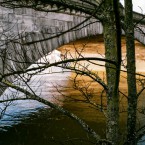
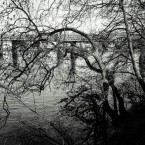
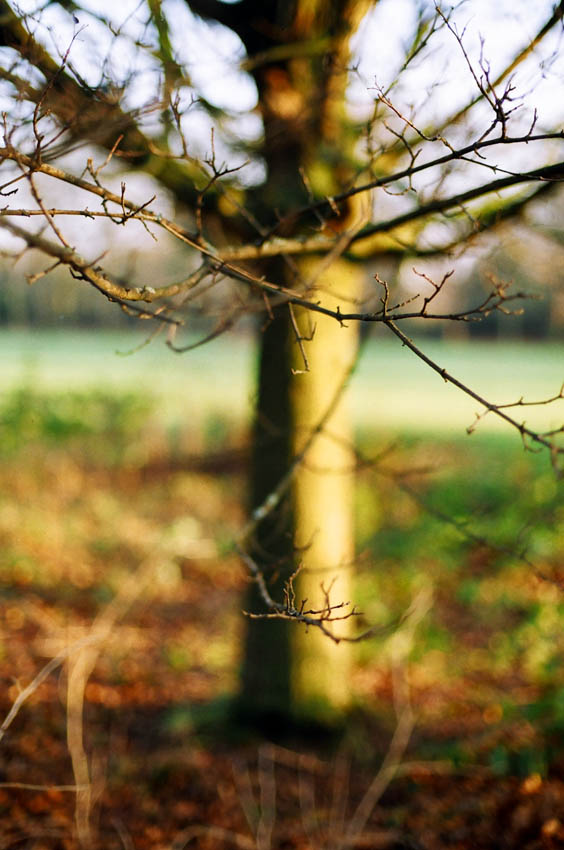
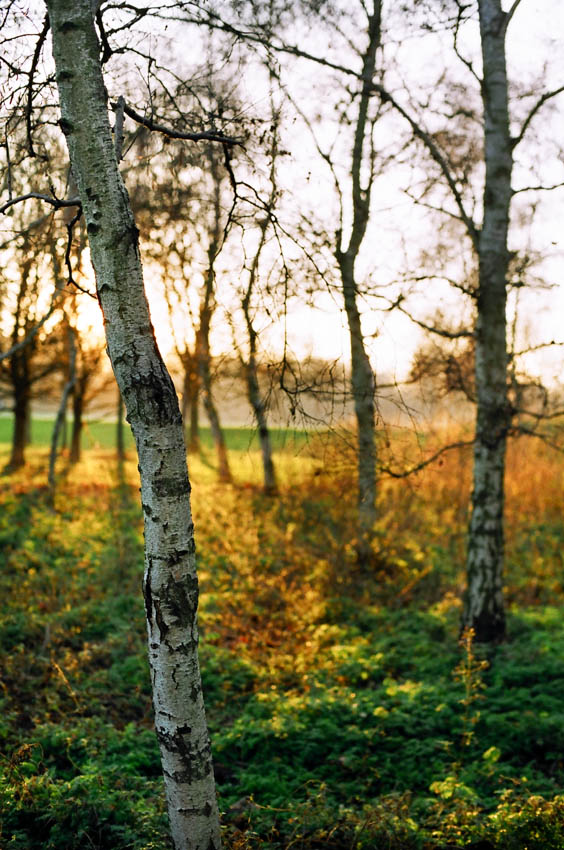
Richmond lock on River Thames - Kallitype print 1998

When I made my Kallitypes, I masked the negatives to create a clean straight line edge to the print. This was due to my coating method. With Jack’s prints, a brush is used and the brush marks are left in the final images. Jack said,”It’s as if someone’s come along with a magic brush and painted the image onto the paper!”. With some of the gum bichromate images below, I used this brush technique, and have included the edges in the final print.

fritillaria meleagris - gum bichromate print

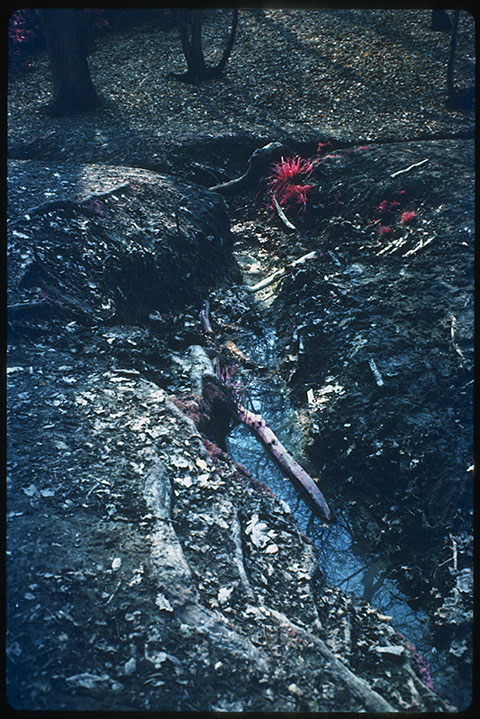
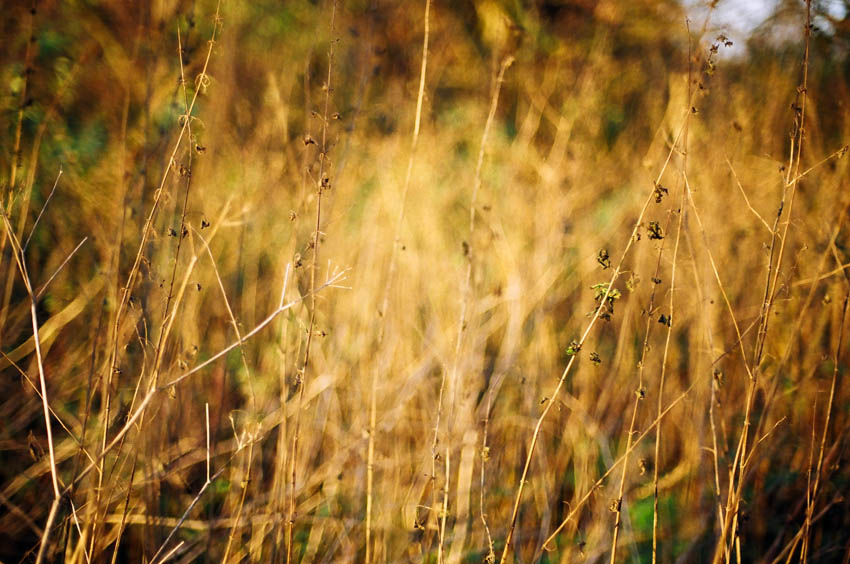
fritillaria meleagris - gum bichromate print 1998

With gum prints, I nearly always printed three layers of colour to build up density. This means you have to be accurate with registering the negative over the image with the subsequent layers. The whole process, with paper preparation would take around five days. The paper had to be left to dry and shrink properly before applying a new coat of sensitizer, otherwise it would be bigger than the negative, causing registration problems.

Although I think the effect can be beautiful, it made the art directors I showed the images to flinch! The time it took made them nervous. I remember showing these to the art director of Gardens Illustrated in 1998, who complimented the prints highly. But she said that, “Unfortunately the editor would not allow gratuitous flower images to be used in the magazine”. Oh well!

lavender - gum bichromate print

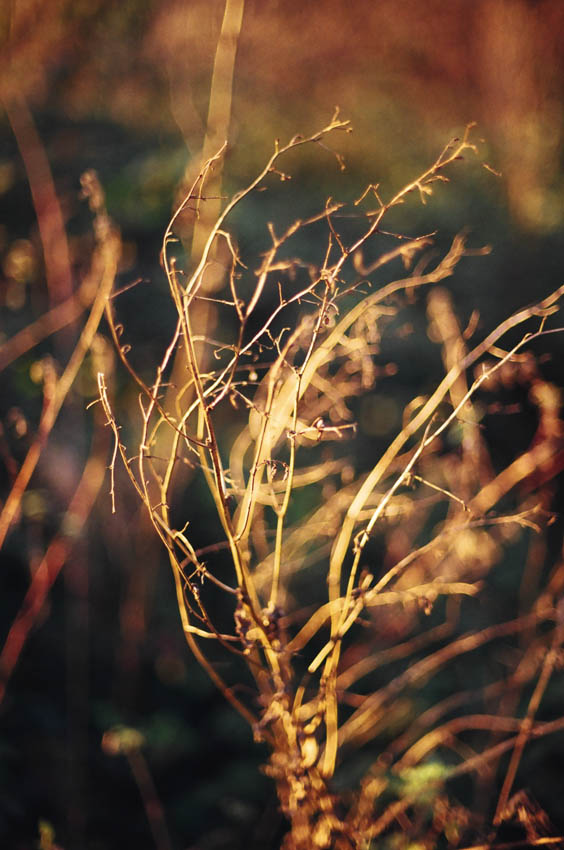
lavender - gum bichromate print 1998

chrysanthemum - gum bichromate print

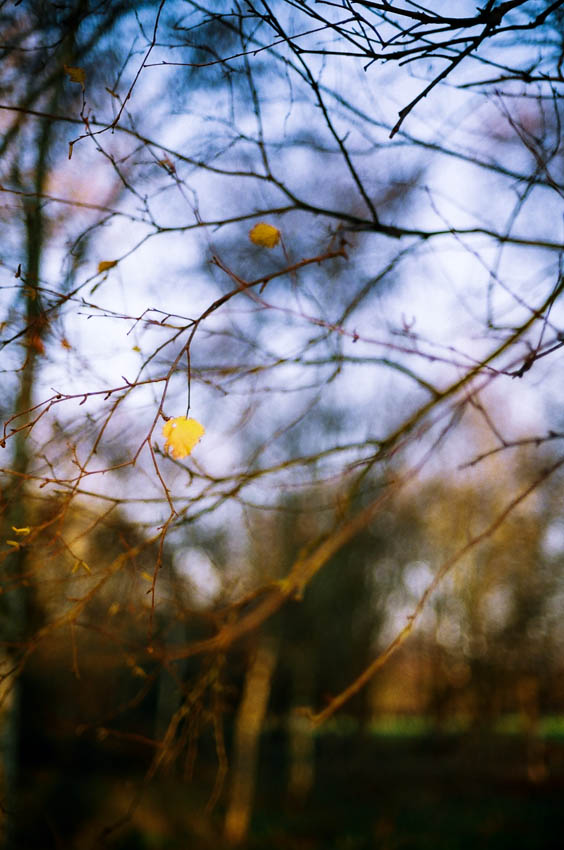
chrysanthemum - gum bichromate print 1998

It’s unlikely that I will be returning to these particular processes in the near future. My darkroom was replaced by a digital studio in 1999. But I do hope to work with Jack soon in producing some photogravure or polymer gravure images using his digital negatives. See my posting from last year. Perfecting and understanding the use of the printing plates has taken slightly longer than I hoped, but I would expect to have some images to show in the next few months.

Parrot tulip - gum bichromate print, 1998

Parrot tulip - gum bichromate print, 1998

Shake it, shake, it like a Polaroid picture…..or not!

The instructions from Polaroid issued after the song by OutKast suggested you shouldn’t really shake your valuable instant photographs as they developed. In fact shaking is more likely to cause damage. So however energetic you feel, gently place each picture on a flat surface …..and watch it, watch it!

Apparently the idea of shaking your print came from using the old peel-apart material which had a damp surface immediately after developing. Shaking the prints helped them to dry – or so the say.

Yesterday I went to Kew Gardens to test my latest photographic acquisition, a Polaroid 320 camera. After much searching online, I had found some old 669 peel-apart film, which was seven years out of date. As it’s not made anymore, it’s hard to come by. It was a bit slow, and the prints had a very strong blue cast too, but I suppose this is the fun of it. And did I shake them? Yes!

So a few examples.

Palm House Kew Gardens - 669 Polaroid print

Palm House Kew Gardens - 669 Polaroid print

Palm House Kew Gardens - 669 Polaroid print

Palm House Kew Gardens - 669 Polaroid print

Palm House Kew Gardens - 669 Polaroid print

Palm House Kew Gardens - 669 Polaroid print

Palm House Kew Gardens - 669 Polaroid print

Palm House Kew Gardens - 669 Polaroid print

Palm House Kew Gardens - 669 Polaroid print

Palm House Kew Gardens - 669 Polaroid print, with the classic fault where the chemical gel fails to spread evenly over the print.

Just before Christmas I tried out another Polaroid camera, this time shooting SX-70 film. This you definitely didn’t shake. In fact it is so sensitive, it needed to be covered with black card as it was ejected from the camera to protect it from the light – then placed in my camera bag for at least five minutes. A complete P.I.T.A! Interesting results though.

'Palm House 1' Kew Gardens - SX-70 print

'Palm House 1' Kew Gardens - SX-70 print

'Palm House 2' Kew Gardens - SX-70 print

'Palm House 2' Kew Gardens - SX-70 print

'Palm House 3' Kew Gardens - SX-70 print

'Palm House 3' Kew Gardens - SX-70 print

'Palm House 4' Kew Gardens - SX-70 print

'Palm House 4' Kew Gardens - SX-70 print

'Palm House 5' Kew Gardens - SX-70 print

'Palm House 5' Kew Gardens - SX-70 print

'Palm House 6' Kew Gardens - SX-70 print

'Palm House 6' Kew Gardens - SX-70 print

Clip, judge and run

Strange how with the passage of time you start to look back with rose tinted spectacles. Three times over the last week I have had conversations about missing the routine of hanging round a film lab after a shoot. For me it was pretty much a daily occurrence, though at the time, I saw it as a real inconvenience.

The last E6 film I had processed was on 21st December 2004. I remember the shoot vividly. A freezing cold day at the Top Gear test track at Dunsfold. Forward 24 hours and a phone call from my lab… “There’s a problem with your action shots”.  “Are they a bit dark?” I asked. “No, only about four shots have come out on each roll”.

I immediately left the Christmas party I was at and headed to the lab in Richmond. Three rolls of film were on the lightbox. Most frames had just half a car. Shutter failure.  My trusty 14 year old EOS 1 had finally given up. The final straw. Digital beckoned.

Even Steve the E6 manager, who was part magician, part agony aunt, couldn’t help. He was usually there to reassure me with a cup of coffee. “Push that half a stop and it will be fine,” he would say. And he would be right. I frequently ran clip tests – a couple of frames cut off and processed for assessment before running and correcting the remainder of a roll. (See below). Not even he could work his magic this time.

Audi at Top Gear Test Track, Dunsfold

Audi at Top Gear Test Track, Dunsfold

Luckily there were enough useable photographs to salvage the job, which required action images to run over a DPS. More fortunately,  I had used another camera for the rest of the shoot, so nothing else was effected.

Rose tinted spectacles? I went back into a pro lab for the first time for many years last summer. The slightly sweet smell of the warm chemistry, combined with filter coffee did bring back some fond memories. I suppose the time spent at a lab was a debrief session, where you caught up and gossiped with other snappers. This still happens, but in isolation, like much communication now, via  email or Twitter. So would I really turn the clock back? No. For a lot of things, digital is too good.

One step forward, one step back

It’s a long time since I played with a video camera. Apart from the occasional school nativity play or pantomime, it must be 10 years since I videoed my daughters as toddlers. After my trusty old Sony camera started to play up I reverted to taking stills of the family. So it was with some hesitation that I read the instruction manual for my Canon 5D MKII, to investigate the DSLR’s moving image capabilities. After two years of ownership, I’m not sure the manual had even been opened! I also fired up iMovie on my Mac Book Pro for the first time, to edit the test shots. So……..the results of about 15 minutes shooting and a couple of hours on the computer:

Obviously a bit rough around the edges, but it was interesting to try out!

Having learnt something new, I couldn’t resist buying a piece of older technology – namely a Nikon FM2. I used to have one of these in the mid to late 1980’s, but I sold it, along with all my other Nikon equipment in 1991, and jumped ship to Canon and their EOS 1. They were a long way ahead of Nikon with autofocus systems. From memory,  Nikon needed four years to catch up. As the EOS cameras were revolutionary, they became a must for anyone shooting sport, and I never regretted moving to Canon.  But I did regret not holding on to the FM2. So a couple of days before Christmas, after seeing an immaculate example on Ebay , I became an owner for the second time.

My new Nikon FM2

My new Nikon FM2, taken with my iphone

Both my daughters were used as more or less willing models while I put around half a dozen rolls through the camera to test the functions. I think it will have more use for portraits, so I guessed this would be a good starting point. The results:

Katie - Nikon FM2 with Kodak Color Plus 200

Nikon FM2 with Kodak Color Plus 200

Katie - Nikon FM2 with Kodak Color Plus 200

Nikon FM2 with Kodak Color Plus 200

Katie - Nikon FM2 with Kodak Ektar 100

Nikon FM2 with Kodak Ektar 100

Beth - Nikon FM2 with Kodak 400 colour negative

Nikon FM2 with Kodak Ultramax 400 colour negative, converted to B/W in Photoshop

It’s interesting to see how your approach to taking photographs changes when using film, as each frame has a value. Greater consideration is given to a scene before the shutter is pressed. I tried an experiment two years ago where I allowed myself only one frame to capture an image. Using a Contax G1 35mm camera with colour negative film, it was strange relying on pretty much your first impression. And refreshing too. There was no preview, and no histogram to distract, no matter how hard I looked at the back of the camera. It took me back to how I was working 10 years ago, and in some ways led to more spontaneity. It’s worth trying every now and again. Even though I love using digital and doubt if I’d could go back to shooting much film commercially, it does help you think differently.

bin in La Linea, Spain

bin in La Linea, Spain - Contax G1 with Kodak Ultramax 400 colour negative film.